Kindergarten- Birds Nests from krokotak.com
Watch the video to see the step by step instructions. To save yourself some prep time, you can make templates and have the students trace the pieces and cut them out on their own.
Supplies:
- construction paper in various colors
- tracing templates
- variety of crayons
- black marker
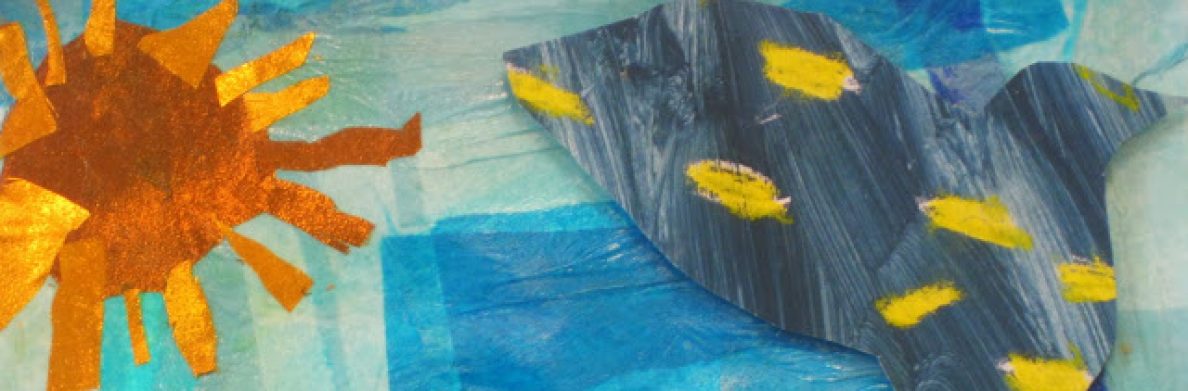
1st Grade- Baby Chicks from youngschoolart.blogspot.com

Supplies:
- blue construction paper
- white construction paper
- orange construction paper
- yellow construction paper or paint & paintbrush (you choose your method)
- green tissue paper
- light blue construction paper (optional for the spring rain)
- black marker
- feathers
- glue stick
Step 1:
First, each child draws a circle and a triangle on white construction paper. The circle will be the chick’s head and the triangle will be his body. Then they enjoyed painting the shapes yellow. If you would prefer, the students can draw the shapes on yellow construction paper and cut them out.
Step 2:
Then have the students draw a large egg shape on white paper. Across the middle have them draw the crack. Now they can cut out the egg.

Step 3:
Next, the chick parts are glued to the blue paper and the egg gets glued next.
Step 4:
Have students draw a diamond shape on their orange paper. They can cut it out and fold it in half to glue on as the beak.
Step 5:
Each student should have 2 feathers and can make 2 eyes to be added next.

Step 6:
Grass detail- cut large triangles out of green tissue paper and glue them in front of the egg at the bottom of the page.
Step 7:
Optional- torn light blue paper pieces can be glued around the chick as raindrops.
2nd & 3rd Grades- Watercolor Butterflies from projectswithkids.com

Supplies:
- watercolor paper
- watercolor paints
- black oil pastel
- paintbrush
- pencil and eraser
- rock salt (optional)
Step 1:
First, you want to prepare your watercolor paper. Taping it to the table will help keep it from moving around and will help it dry flat and not wrinkle.

Step 2:
Use a pencil to draw one side of a butterfly. You want the butterfly body to be at the edge of the paper. Taking a look at some photos of real butterflies will help kids to draw their own butterfly picture.
Kids can use butterfly photos to help them draw out their butterfly wing shapes and also to draw in the patterns on the wings.
Remind kids to draw lightly, so they can erase their drawing if they need to.

Step 3:
Use black oil pastel to outline the butterfly wings and to color in the butterfly body.
While kids are using their black oil pastel, they can make some of their lines thicker and some of them thinner.
Using oil pastels with watercolors can be a bit smudgy, so just remind kids to watch out for smudging the pastel with their fingers.
Step 4:
Once your butterfly is outlined it’s time to paint the wings! Have kids choose three colors for the wings. Again, looking at photos of real butterflies can help with their color choices.
When you are painting your wings, paint one section at a time using a small to medium round brush. If you are painting straight from the paint set, then try wetting your section of wing first, before you paint, this will help to blend the colors together. This is called a wet on wet technique.

Step 5:
Kids can choose blue or green like our examples or any color they like. Just make sure the background color is different than the butterfly color.
With the blue background, I did one color using a wet on wet technique and then added salt for texture.
Using a larger round brush for this step will make it easier for kids to paint the entire background.
(Optional- While the paint is still wet, sprinkle coarse salt on the background. Kids can choose to sprinkle just a small amount in a few places or sprinkle the salt all over their background.
As the paint dries it will create interesting patterns and textures. I recommend leaving everything to dry overnight if possible. Brush the salt off into a sink to reveal your background!)
4th & 5th Grades- Funky Bunnies from wonderbarart.com
**this could work for 2nd & 3rd too- they can focus on making simpler lines and patterns**

Supplies:
- Black marker (flair pen or skinny sharpie)
- Bunny template (printed on white paper)
- Watercolors
- Paintbrush
- Pencil and ruler
Step 1:
Discuss with students lines and patterns. You can also introduce them to Zentangle. Use this link below to find examples and blank templates for students to practice before beginning their bunny.

Step 2:
Draw lines to make patterns in each section of the bunny.
Step 3:
Cut out the outline of your bunny as well as the glasses you’ve chosen.

Step 4:
You can glue your bunny on colored card stock or construction paper, or create your own background with watercolors. We decided to draw a patterned background which we’ve colored with watercolors.
Step 5:
Glue the bunny and glasses on your paper once dry.


 or
or 
 , OR,
, OR,  ,
, 
