November Art: Paul Klee Inspired Portraits

I found this month’s featured project on the website Teach Kids Art.  Some of the information here is copied directly from that lesson plan. You can view it directly here: http://www.teachkidsart.net/self-portrait-workshop-paul-klee/.  However, I have tweaked it a bit by adding a lesson with in a lesson.  I think that these portraits can be done by all grades with slight modifications.  I tried this at home and found that it was easily done within an hour and the prep and clean up are minimal.  It was a really fun project, I hope you enjoy it as much as I did.

Mate­ri­als:

  • water color paper (use 1/2 sheet from Washington stock)
  • Black chisel tip marker OR black crayon (I used fine tip)
  • “Bleed­ing” tis­sue paper in bright col­ors, cut into squares and rectangles
  • Water­color brush
  • Water and containers

photo-9

To Lesson:

Share a little background on our featured artist

“Paul Klee (1879–1940) was a Swiss artist known for his highly indi­vid­ual, abstract style. His work was influ­enced by many dif­fer­ent art move­ments, includ­ing Expres­sion­ism, Cubism and Sur­re­al­ism. This project uses squares of “bleed­ing tis­sue” for it’s vivid colors” (teachkidsart.net)

Have students draw a basic self-portrait in Pencil

These should be unshaded, and only an outline of basic features.

I found this tutorial a wonderful way to work in a step-by-step manner: http://www.artsmudge.com/2012/05/how-to-draw-proportional-self-portraits-with-kids/

The above link shows how to teach kids how to make basic proportions and features.  I would highly recommend it!

Trace the portrait with a fine tip marker or black crayon

Remind students to only trace the outline and not add anything on at this point

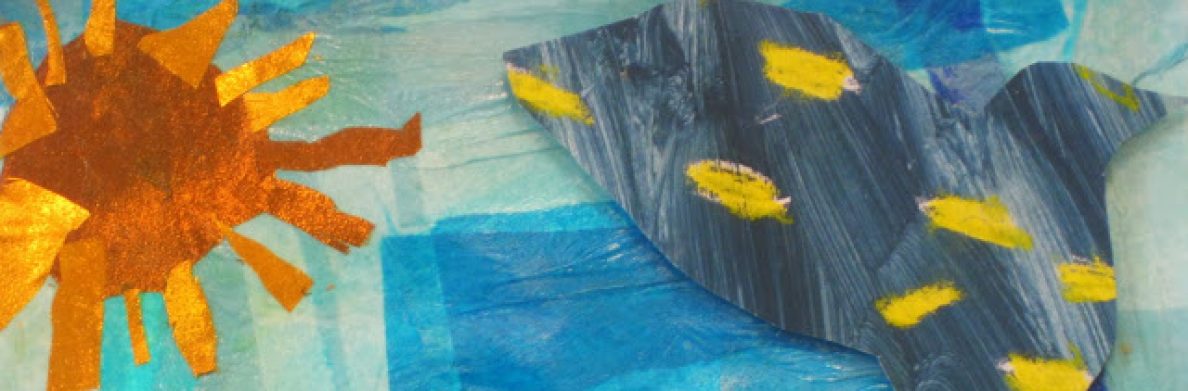
Tissue paper “Paint”

Place a piece of tis­sue paper on your draw­ing and use a paint brush to paint over it with water. Repeat with con­trast­ing col­ors until the entire paper is cov­ered with pieces of wet tis­sue paper and no white paper is show­ing. You may wait for tis­sue to dry before remov­ing it, or sim­ply take it off as soon as it has had a chance to bleed its color onto the paper. (http://www.teachkidsart.net)

Topics for further exploration:

  • What is abstract art?
  • Ask stu­dents what makes their self-portrait “abstract”?
  • Paul Klee was influenced by cubism.  How an you see the influence of cubism in his work?
Paul Klee, Dunenlandschaft
Paul Klee, Senecio
Paul Klee, Senecio

October Featured Project: Black cat over Harvest Moon

This month’s lesson uses acrylic paint to explore basic painting techniques, blending color and shape with a fun, seasonal project.


Supplies:

  • 9×12 Grey Construction Paper
  • Red, Orange, Yellow and White Acrylic Paint
  • Palette with individual paint cups
  • One medium brush
  • One small or fine point brush
  • Black construction paper (K and 1st grade only)
  • Pencil
  • Scratch paper


The Lesson:

Introduction

  • Look at pictures of the harvest moon. Discuss (or re-visit) principles of color theory from September’s project. Ask questions! Of the colors we are using today, which are Primary? Secondary? What happens when we mix white with red?
  • Explain the materials students will be using and how they should be handled.
  • Distribute brushes (no paint yet!) and have students explore making smooth circular strokes to create shape and direction. Or, have younger students practice making spirals and circles in the air or table with their fingers.
  • Explain that we will be blending colors on the paper. Paint colors should remain separate on the palette.


2nd Grade Art
2nd Grade Art


Create

  1. Using the larger brush, begin at the center of the page making spiraling circles to create a moon. Students can switch colors as the circle grows, but encourage them not to layer paint to heavily (you will need it to be partially dry for the next step). As the students create their moons, show them how them can dab the tips of the brushes into the paint to add accents of the base colors. Noticing how layering color crates a different effect from mixing them.


  1. Collect large brushes and set aside moons and work on creating cat silhouettes (note: K and 1st grade will have better luck combining pre-cut shapes to create their cats. Use black paint to create a spiral tail if time allows.)


  1. Practice on a scratch paper. For grades 2-5 have students practice drawing the cat with pencil first, practice with paint on scratch paper the 2nd time, and then use the smaller brush to paint directly over moon for the 3rd time. In addition to building skill and confidence, you will allow paint to dry partially for a cleaner application of black paint.

To make cat: 1. Create an egg shaped oval (slightly larger at bottom). 2. Make a sideways oval for head. 3. Draw triangle ears 4. Add spiral tail


  1. Add tree branches to complete.

Additional info. For learning:

Harvest Moon Pictures will be available to use.  They can be found with the set aside supplies for the month.

harvest moon 1 harvest-moon 2

What are acrylics?

Acrylic paints are water based, versatile, fast drying and create crisper edges then oil based paints.

How to use and hold a paintbrush:

Younger grades will benefit from practicing with a dry brush first. They “paint” the table or paper in long, circular strokes to get a feel for the circular movement and the weight and shape of the brush.

Older students may benefit from explore different ways of holding a brush to get different results. For a more clean line, they may grip the brush further down. For looser, or more fluid strokes, they can hold the brush closer to the top.

Blending Colors 

For this project, be sure that students blend paint on the PAPER. Students, especially the younger ones, will blend all colors on the palette. In this project, have students “dip” brush into the paint , dab it on the paper and blend it as they create the circle of the harvest moon.